| TABLE OF CONTENTS - CASE INFORMATION |
| Topics in this Section: |
| How to Get to Case Information - Registration - Life - People - Death - Medical - Body - Disposition - Visitations - Services - Events - Financial - CPP - Miscellaneous |
| HOW TO GET TO THE CASE INFORMATION WINDOW |
| Method 1: If you go through the Add Case screen(s) and complete the intial case details by pressing the Finish (or OK) button, you will be automatically routed to the Case Information window.
Method 2: If you wish to edit a case that is already in your system, (1) click your Atneeds or Preneeds list, (2) click to highlight the case in the list, (3) then click the Edit button. *Shortcut: Double-clicking on a case in the list will bring up the Case Information window as well. |
REGISTRATION (TAB) |
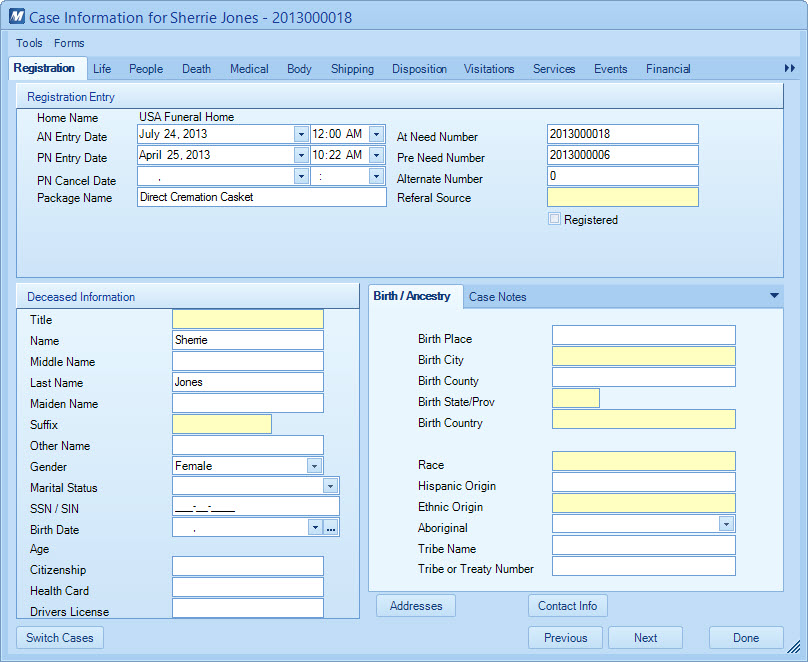
| The Registration tab covers some of the basic details about the decedent, such as their name and birth details. Additionally, on the sub-tab called Case Notes, you can type in extra details about the case at your leisure. It is also worth nothing that the address details about the decedent can be edited by clicking on the Addresses button at the bottom-center of the screen. |
|
LIFE (TAB) |
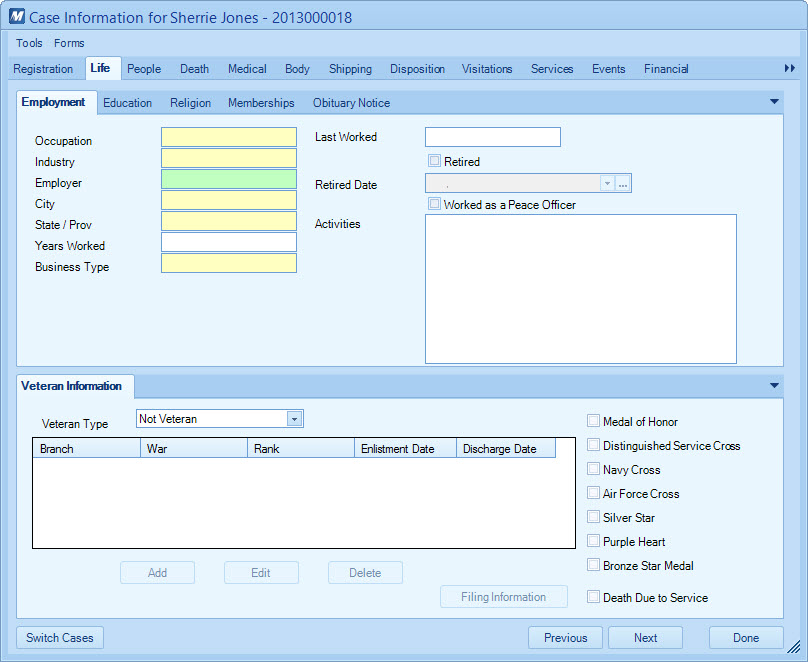
The Life tab contains the following areas of information (all found in their own sub-tab): |
 |
| PEOPLE (TAB) |
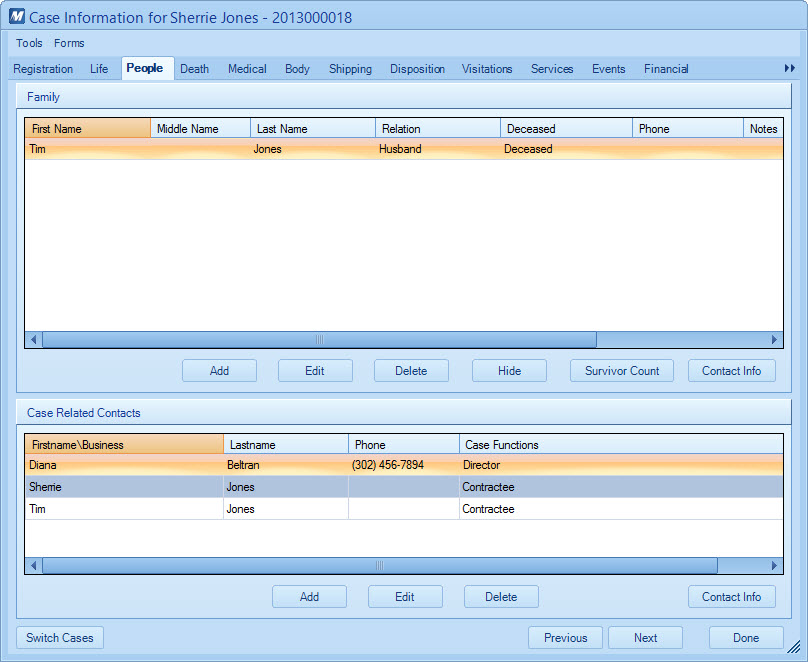
| The People tab is where all of the family and case related contacts get entered in. The screen is split in two grids: Family members in the top and Case Related Contacts in the bottom. Case Related Contacts are people related to the case because of a specific role, such as the director in charge, the contractee (that is, the responsible party), or the informant. Please note that it is possible to have a person showing in both grids if they are family and fulfilling a special role. Adding/Editing: For adding and editing people on this screen, use the buttons under the corresponding grid. If you are adding a person that is both a family member and a case related contact, use the family grid's add button. Deleting: Highlight a person that you wish to delete, then click the delete button. Please note that deleting the person here will NOT remove the person from your address book, it deletes their connection to the current case. This cannot be easily undone. Use the hide button instead if you don't want to permanently remove the relation. Hide: The purpose of the hide button is to remove a relationship between a person and the decedent. If a relationship is hidden, you can un-hide it later, unlike the delete relationship option. Override: The purpose of the override button is to change the relationship between a person and the decedent when the relationship was derived by Mortware. Please note that this button only appears when the relationship is derived by Mortware. |
 |
| DEATH (TAB) |
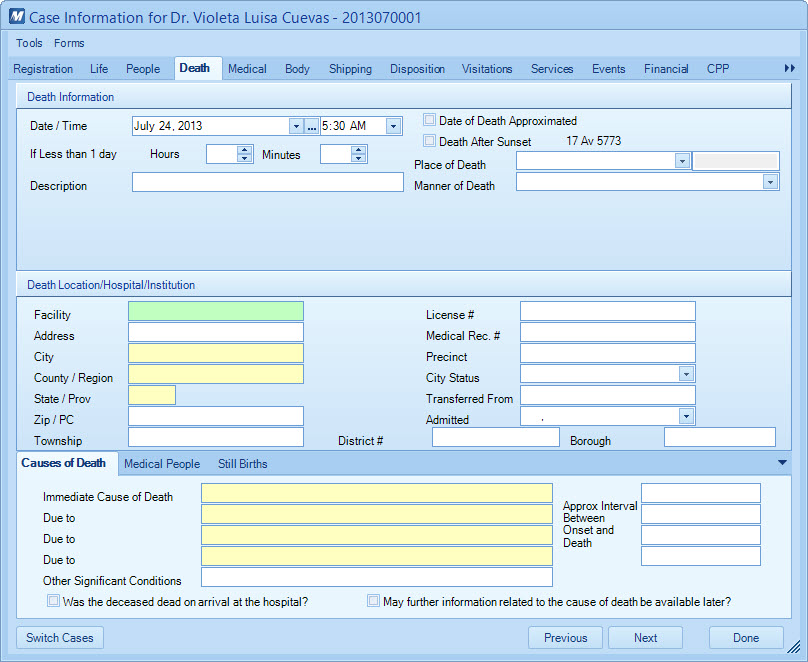
| The Death Information tab takes care of basic death information such as dates and times, as well as the location of death. Near the bottom of the tab, there are three sub-tabs: Causes of Death, Medical People and Still Births. Causes of Death: This tab allows you to enter the medical causes of death, intervals between the causes and two other cause of death related options. (Pictured below) Medical People: This sub-tab allows you to attach medical people and their specific roles to the case. Still Births: This sub-tab contains still birth information. |
 |
| MEDICAL (TAB) |
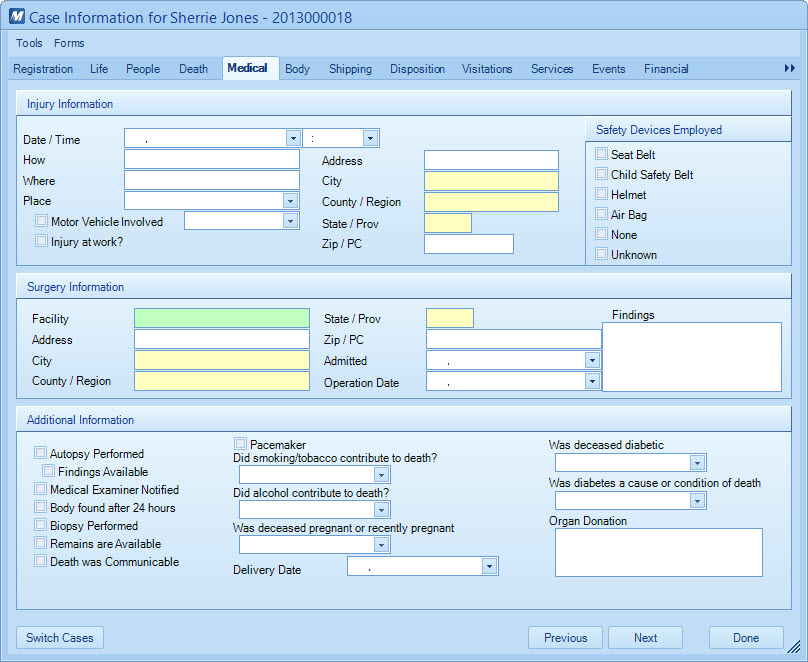
| The Medical Information tab contains the additional death information such as Injury Information, Surgery Information and Additional Information. |
 |
| BODY (TAB) |
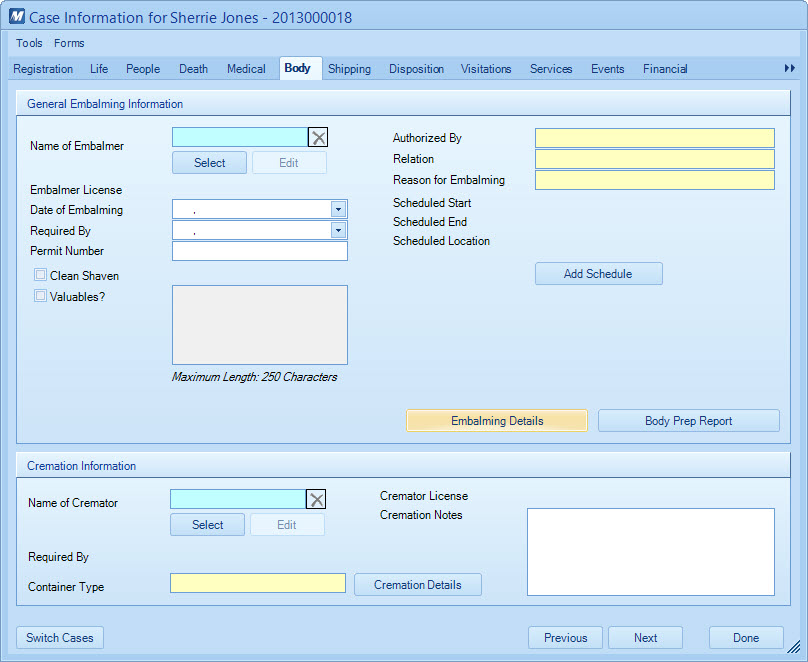
| The Body tab contains details about Embalming, Cremation and Body Shipping. |
 |
| DISPOSITION (TAB) |
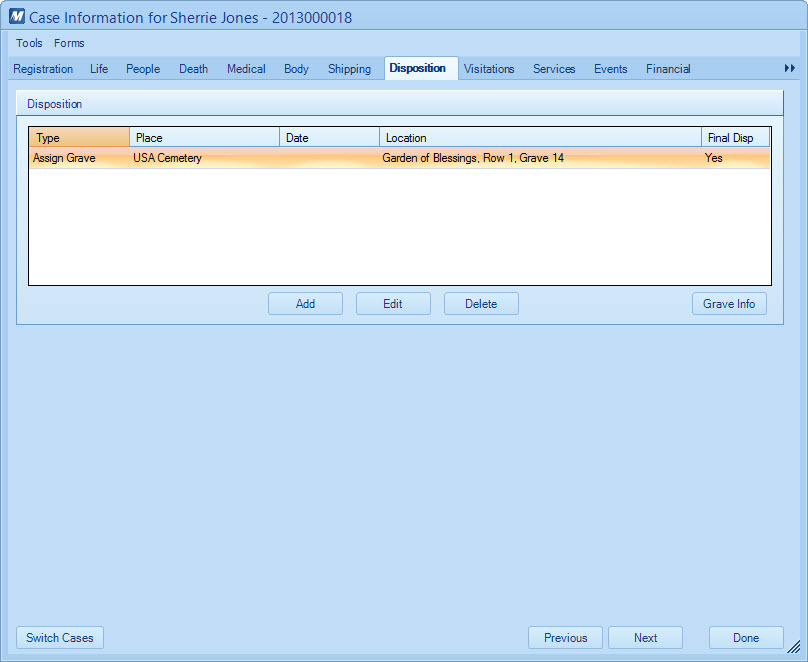
| The Disposition tab is where information about the disposition is to be entered. You may use the Add, Edit and Delete buttons to enter in as many dispositions as needed. All that the program requires is that one of the dispositions be flagged as the Final Disposition. |
 |
| VISITATIONS (TAB) |
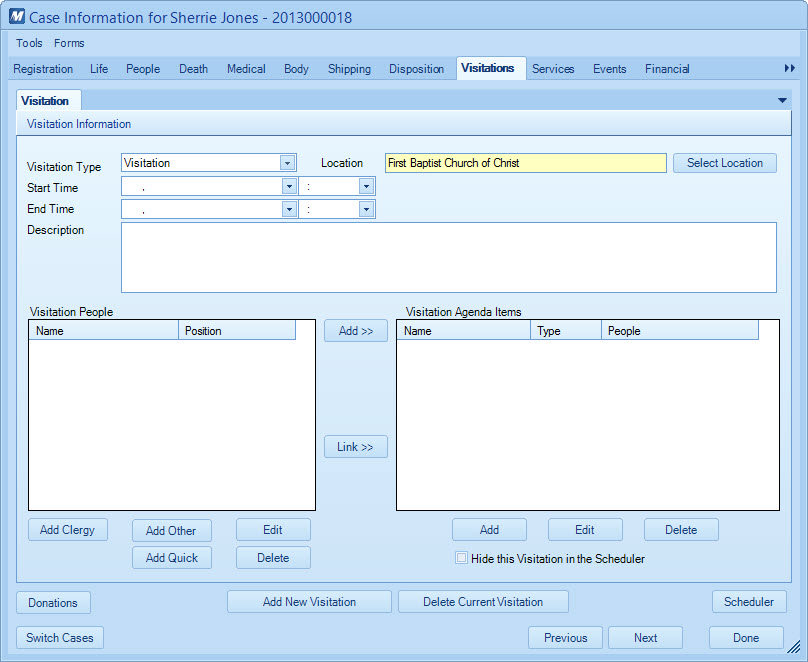
The Visitations tab allows you to put in dates, times, locations and related people and responsibilities for the visitations. You may add as many visitations as you need. |
 |
| SERVICES (TAB) |
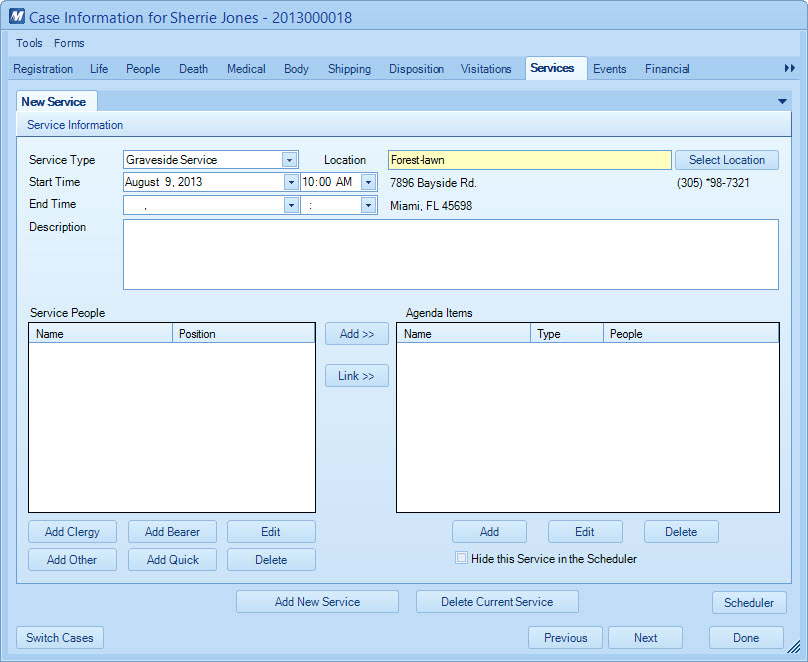
The Services tab contains the details about services. Similar to the visitation tab, you may enter in the type of service, location for the service, date and time for the service, people involved in the service, and agenda items for the service. Like visitations, you may enter as many services as you need. |
 |
| EVENTS (TAB) |
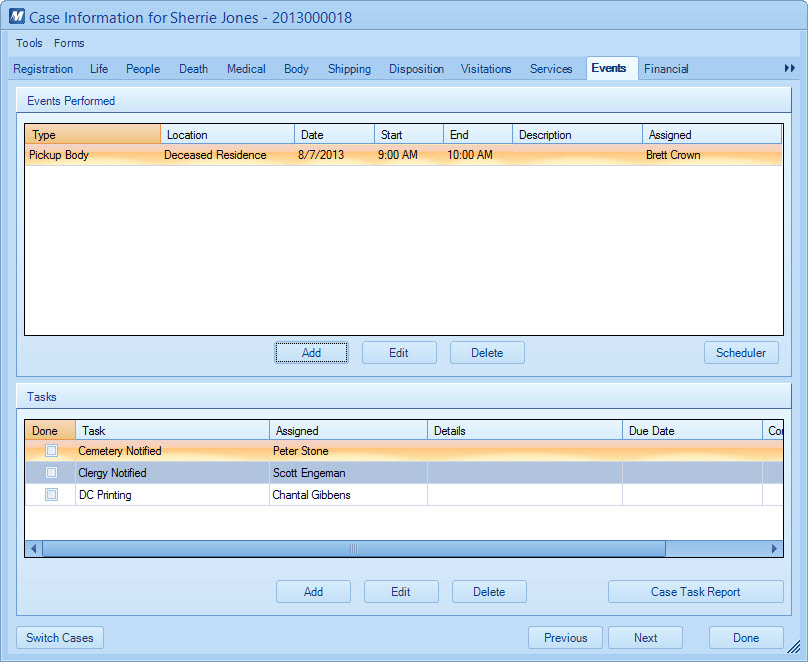
| The Events is divided into two grids, the top grid being for events that are happening for the case, and the bottom grid being for special tasks that need to be completed for the case. Events are typically appointments and happenings that are occuring in addition to the visitations and services. Tasks are chores that need to be completed for the case. Both events and tasks allow for staff to be designated to them. Adding New Event or Task Types: When choosing the type for the event or the task for the first time, you might find that the list to choose from is empty. You may take time to set up the options in the list under the Setup menu beforehand. After being set up, you can simply choose from them. |
 |
| FINANCIAL (TAB) |
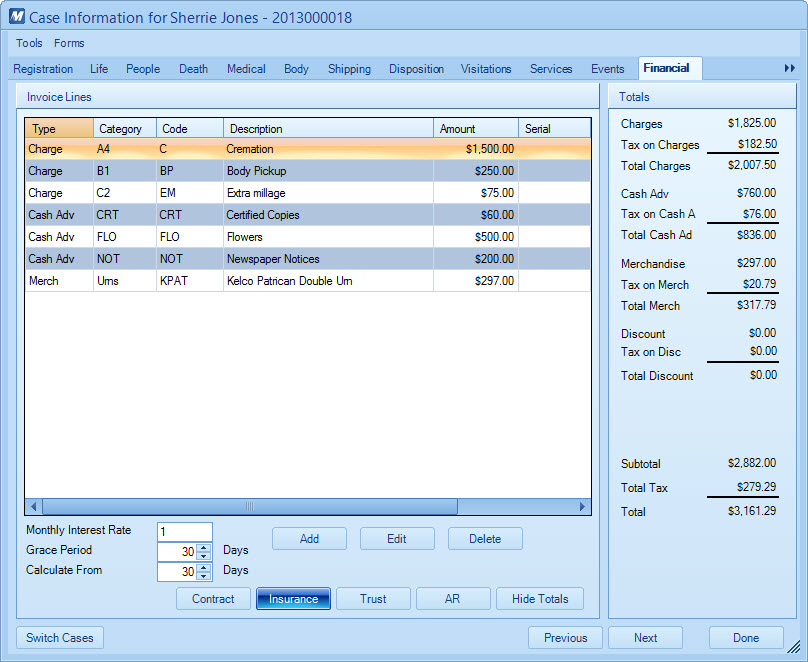
| The Financial tab contains all of the financial portions on the invoice(s), overdue interest charge options, contract details, as well as links to Insurance, Trust, and AR (that is, accounts receivable). Invoice Lines: The Invoice Lines grid displays charges, cash advances, merchandise, and discounts with all of their corresponding amounts. Add, Edit, or Delete invoice lines with the respective buttons below the grid. Interest Rate: Located in the bottom right of the financial screen, you have three options regarding interest charges. The Interest Rate option is expressed as a monthly percentage. The Grace Period option represents the amount of days of grace the contractee has before interested is allowed to be charged to their account. The Calculate From option designates the time when interest calculations will begin once the grace period has expired. Please note that these three options can be altered specifically for each case on an individual basis from this financial screen, but can also be set as default values from the Financial Values tab in Home Setup. Contract: The Contract button leads to another screen that allows you to set special payment terms, cemetery requirements, the reason for shroud and the reason for vault for this case. Insurance: The Insurance button leads to another screen that allows you to enter insurance assignment details, such as the company details and face value amounts. Trust: The Trust button leads to another screen that allows you to key in details about Trust Insurance, Term Deposits, Savings Accounts and Trust Payment Schedules. AR: The AR (Accounts Receivable) button leads to another screen that contains buttons to post invoices, payments, adjustments, and notes (among other things). |
 |
| TRUST (BUTTON) |
| The Trust window is where you are going to set up your trust accounts, as well as posting account transactions, and closing the trusts.
To access the Trust screen, first navigate to the Financial tab on a case, then select the Trust button at the bottom of the window. (See Picture) |
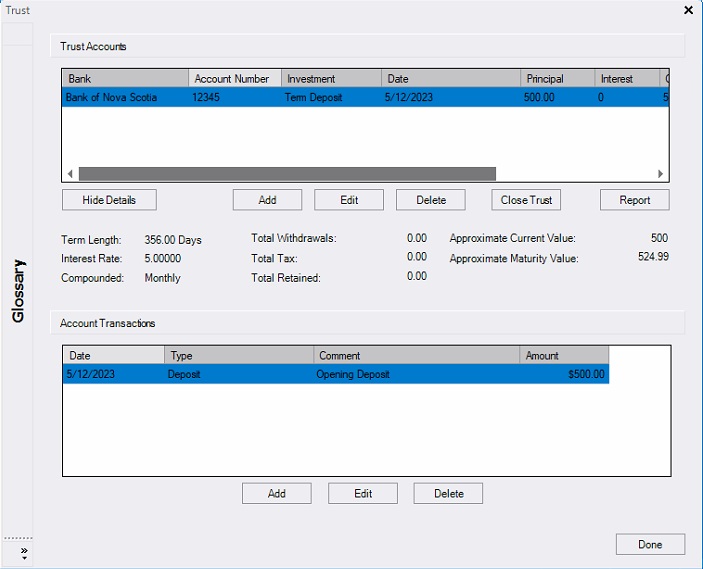 |
| Show Details will expand the section in the middle to display the details of the currently selected Trust account. Add button under the Trust Accounts box will pull up the Add Funeral Trust window. Just fill in the fields needed and click next when done with each section. (See Picture 1, 2, 3) Edit will bring up the same window as the add button, but just for editting the currently selected Trust Account. Delete will delete the currently selected trust, as long as it has not been closed. Close Trust will close the current Trust Account and allow you to post the amount to the case as a payment from the Trust provider. (See Picture) Report will pull up a Trust Report detailing the transactions and approximate interest. Add button underneath the Account Transactions box will pull up the Trust Transaction window where you can add in a deposit, interest, withdrawal, etc.. (See Picture). Edit will bring up the same window as the Add button, but will be editting the currently selected Trust Transaction. Delete will delete the selected Trust Transaction Glossary on the left hand side will display some simple explanations of the Principal, Current Balance, Status and Closing of Trusts. |
| CPP (TAB) |
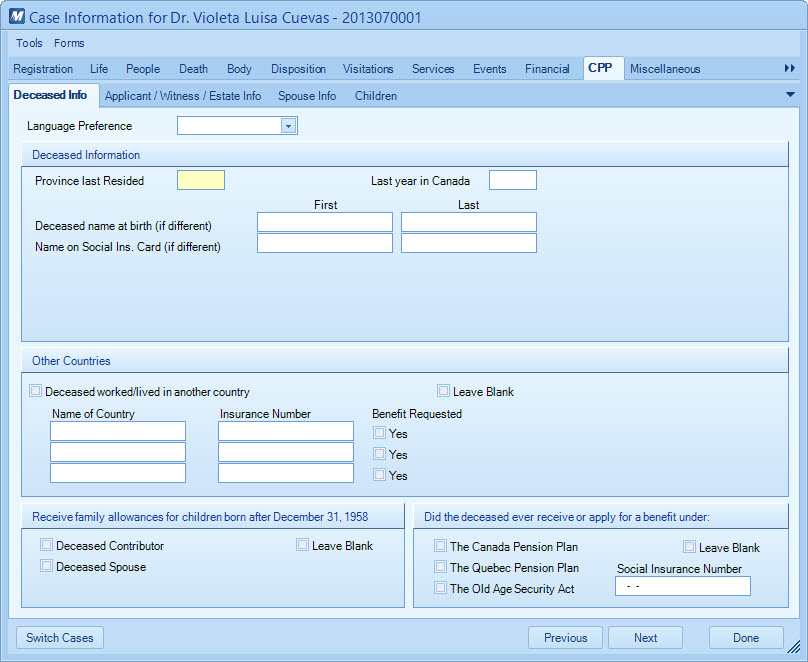
| The CPP tab is exclusive to Canadian funeral homes. This tab contains information specifically for filling out CPP forms (that is not already included elsewhere in the case information screens). This screen is divided into four sub-tabs: Deceased Info, Applicant/Witness/Estate Info, Spouse info, and Children info. |
 |
| MISCELLANEOUS (TAB) |
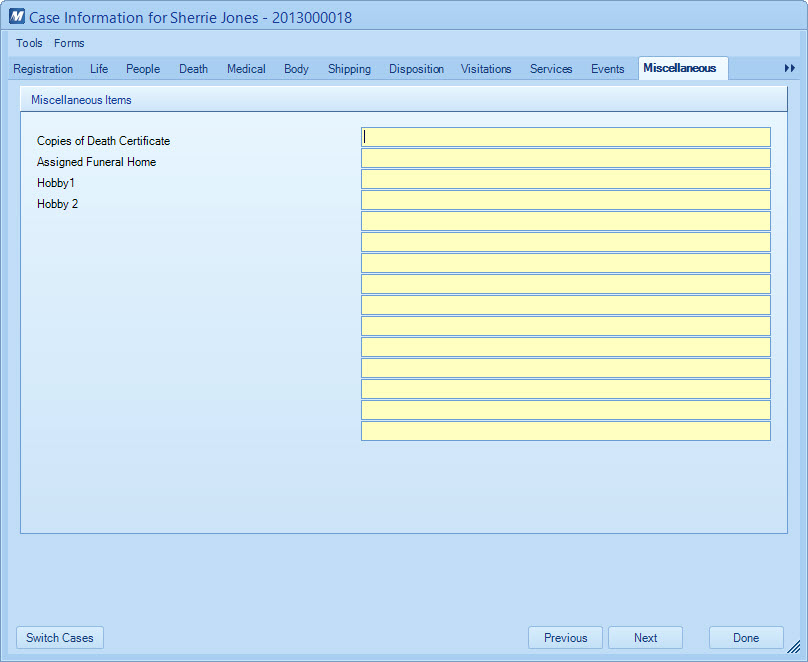
| The Miscellaneous tab is a special screen that allows for you to add additional fields of information to the program. For each yellow field on the right side, you are allowed to customize the caption for the field on the left side of the screen. To set these fields up, you must enter the captions into your Home Setup. |
 |

