TABLE OF CONTENTS - HOME SETUP
Topics in this Section:
How to Get to Setup - General - Preferences - Taxes - General Price List - Contracts - Forms - Reports - Miscellaneous
HOW TO GET TO FUNERAL HOME SETUP:
Method 1:
Click on the "Home Setup" icon while looking at the button view screen or on the Mortware tool bar.
Method 2:
Select your Funeral Home Name on the explorer side bar, then go to the SETUP menu on the top of the window and choose "Home Setup".
HOME SETUP - GENERAL TAB
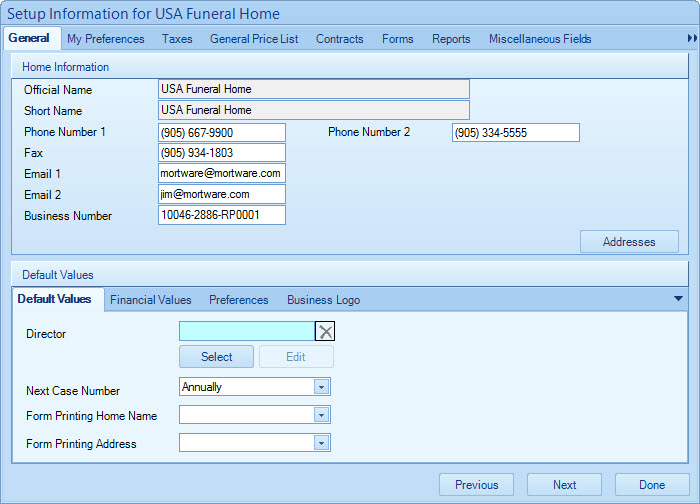
From the general tab of home setup, you can enter in your main funeral home details such as your phone number and fax number. By clicking on the "Addresses" button (Right), you can proceed to enter your main and/or secondary addresses for the business.
The bottom half of the general tab features sub-tabs that contain some other default settings dealing with the funeral home.
- Default Values tab allows you to set a default funeral director, your next case numbering system, and how your company/home name will print on various forms.
-
Financial Values tab has settings for overdue account interest rates.
- Preferences tab contains various preference settings.
- Business Logo tab allows you to attach a business logo to the program (for some forms).
HOME SETUP - MY PREFERENCES TAB
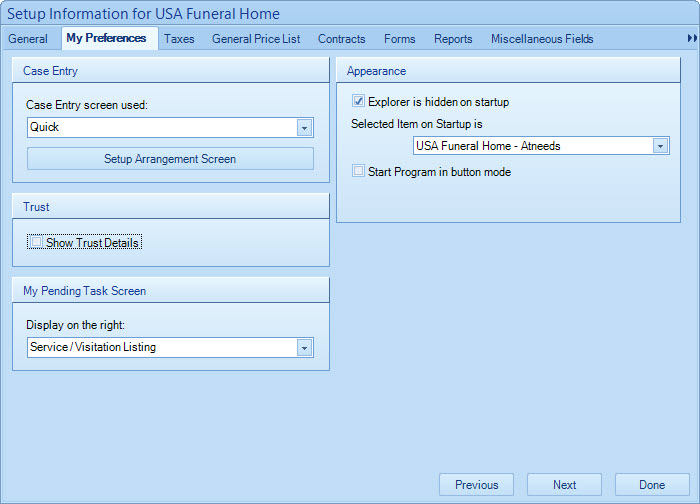
Case Entry (for adding a new case)
There are three choices you may select for your preferred case entry screen:
Standard - This is a one-screen entry option which includes information for the decendent, as well as case number and funeral package choices.
Wizard - This entry method carries you through a screen for the decedent, then proceeds through a screen for each immediate relative
(Informant, Spouse, Father, Mother), then through a final screen for case number, package, and the director in charge choices.
Quick -
This is a simpler version of the standard case entry option (Most comparable to Mortware 2000's add case entry screen.)
Appearance
"Explorer is hidden on startup" - The "explorer" side-bar can be shown or hidden when MW Professional first opens up for a user.
"Selected Item on Startup is" - This option allows the user to have the selected screen be open immediately when MW Professional first opens.
"Start Program in button mode" - Starts the program in button view.
HOME SETUP - TAXES TAB
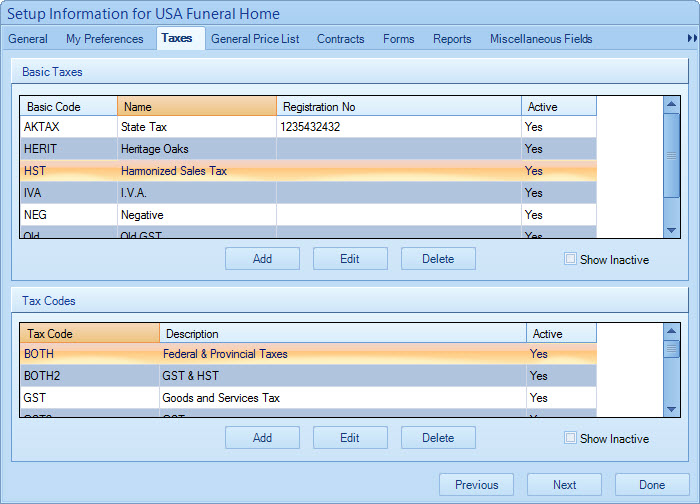
Basic Taxes - These are what can be setup to match the different tax rates for your state or province.
Tax Codes -
These define how the basic tax codes are used. These are the choices you will be able to select for each item on an invoice breakdown on the Financial Screen.
HOME SETUP - GENERAL PRICE LIST TAB
This screen is divided into several sub-tabs:
Charges - Contains the funeral home charges and services that are offered.
Cash Advances - Contains cash advances that are offered in addition to funeral home charges.
Discounts - Contains any discounts that are set up for discounting packages or invoices.
Packages - This tab allows the user to setup different funeral types/packages and associate the corresponding items for each package.
GPL Printing - From this tab, a user can setup and print out a general pricelist.
GPL Dates - Allows a user to setup the "As of" dates for a general pricelist printout.
HOME SETUP - CONTRACTS TAB
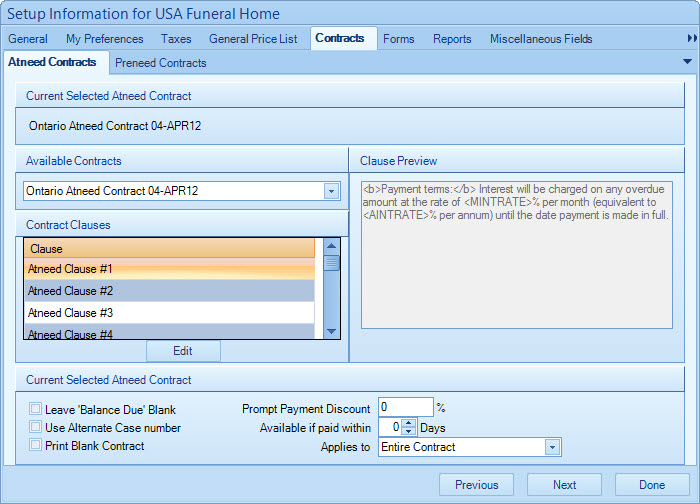
Available Contracts - Drop down the combo box to select a formal style of contract for printing out on funeral cases.
Contract Clauses - For each contract, a user can setup the verbage for various sections of the contract style chosen. To do this, simply click on a clause in the list and then click the "Edit" button. Proceed to then edit or add to the terms in the "Clause Preview" box on the right side of the screen.
Default Values - These options allow you to setup various contract related options. This is also where you can setup a "Prompt Payment Discount" for quickly paying contractees.
HOME SETUP - FORMS TAB
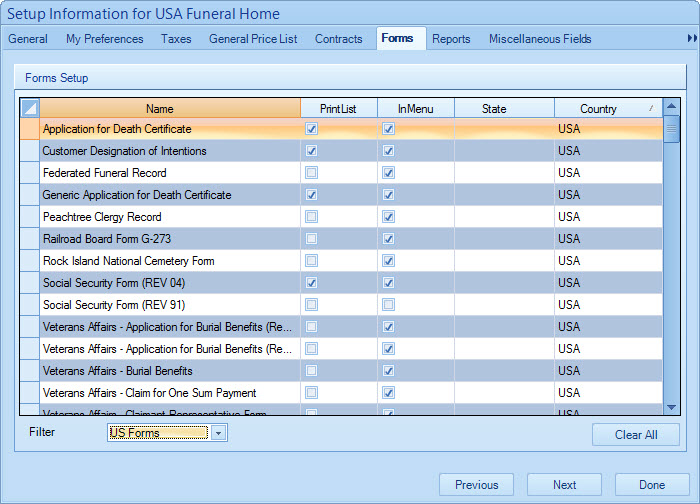
From the forms tab, a user can setup exactly which forms are displayed in the Forms menu from both the Multiple View window and the Case Information screen menus.
Print List - If you place a checkmark in this column for a form, the form will be included in your Print List.
In Menu - If you place a checkmark in this column, the form you put the checkmark beside will be included in your Forms menu.
Filter - You can change the filter drop-down box to look through other forms as well. All Forms will simply list all available forms in Mortware Professional.
HOME SETUP - REPORTS TAB
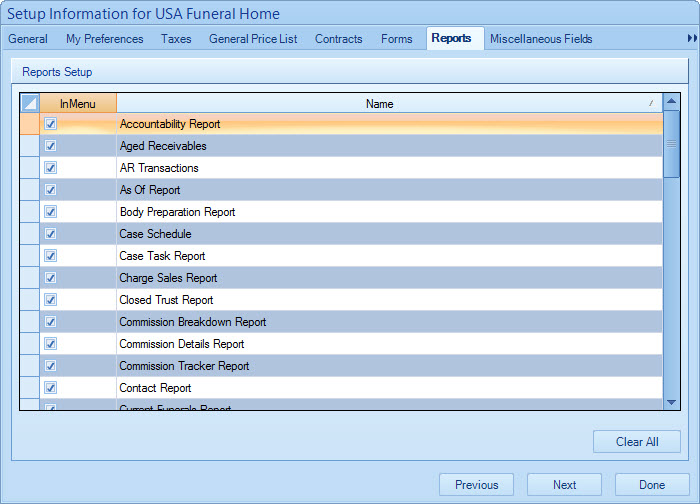
From the reports tab, a user can use the "In Menu" column to check on or check off different reports that you wish to include in the Multiple View Reports Menu.
HOME SETUP - MISCELLANEOUS FIELDS TAB
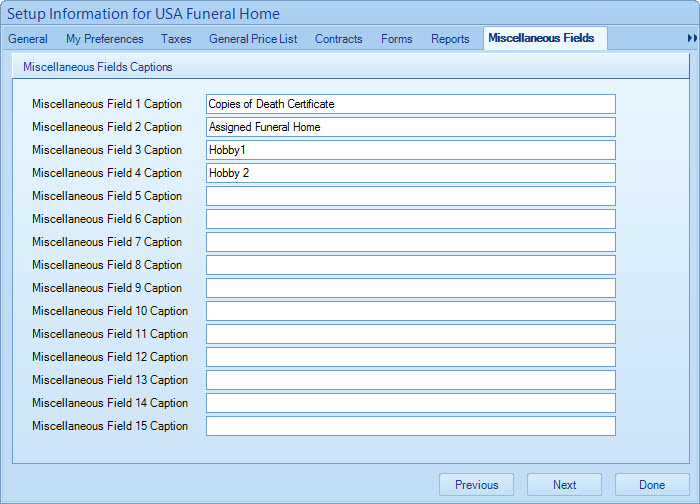
Miscellaneous fields can be setup and used to give the user the ability to keep track of information that is currently not found anywhere else on the prior case information screens. The captions that you define from Home Setup will be evident on the Miscellaneous tab when entering case information.


